This blog contains affiliate links. To learn more, please read the Disclosure.

Wednesday, May 3, 2017

How To Trace An Image Into Your Bible


Transfer an Image into Your Bible: Hot Air Balloon

Transferring images. How do people do it? There are lots of methods out there. Of course, carbon paper is the most obvious (to me, anyway), but how many of us have carbon paper on hand these days? What other methods are there?

Bible journaling: hot air balloonsI decided to try a few, and I'm going to share my failures and ultimate success here with you.

I decided to do this very cool hot air balloon design for Colossians 3. I'd seen something similar on Pinterest, but decided to design my own. (Get the Hot Air Balloon design here.)

Charcoal
The first method I tried was printing out my design and coloring on the back with willow charcoal. I'd done this before to transfer images to furniture. But I quickly found out it doesn't work well for Bible journaling. The charcoal is just so messy, and every time my hand touched the paper, it transferred charcoal to my page. It just wasn't working. Luckily, it's easy to wipe off the page.


Willow charcoal for transferring images is just too messy.

Luckily it wiped right off the page.

I-Pad Light Box
Next, I tried using my I-pad as a light box. I put the design under my page and placed the I-pad behind it to simulate a window. It kind of worked, but it was hard to see the design behind the type in my Bible, and my I-pad kept thinking I was touching it, and the page jumped around.

Using I-pad as a lightbox for bible journaling transfer.

I-pad backlighting didn't work so well under the page type.

Crayon/Pencil On The Back
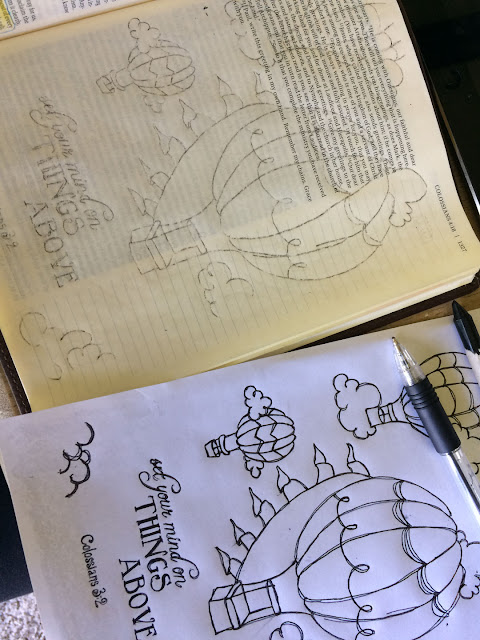
Finally, I decided to try a method I learned in 6th grade: color the back of my design with a black crayon and trace it with a ball-point pen. We have a WINNER! This method was most effective for a good, smooth transfer of the image to the page. (Pencil also works.)
Bible Journaling Ideas: Hot Air Balloons

Hot Air Balloons for Bible Journaling
Transfer an image to your Bible: color the back with black crayon and trace with a ballpoint pen.
Works great!
Trace & Color
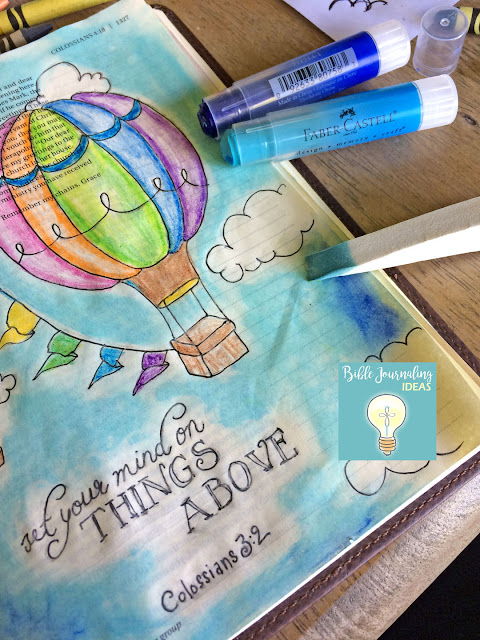
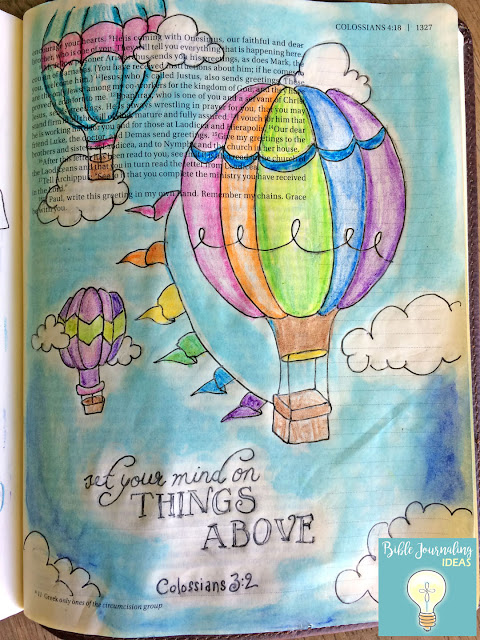
After I transferred my image, I traced it with a Micron pen (no bleed through) and then I used a regular pencil eraser, and it worked pretty good for erasing the black crayon marks. After that, I colored in the design with good old crayons and used blue Gelatos for the sky. You can learn more about how to use Gelatos here.

Bible Journaling Ideas: Hot Air Balloons

bible journaling: hot air balloons


Summary
Over all, I think the black crayon/ballpoint pen method is the best I've found. It's cheap and easy. Most of us have crayons on hand. And it just plain works.

Now that I have a tried and true method, I hope to design more transfers for my favorite Bible verses! Look for them in my Etsy shop: MyPorchPrints.

And if you have Bible journaling ideas you'd like to share, message me on Facebook! Thanks!

Want MORE Bible J Ideas? 
Read about how to use white crayon in your Bible journaling.

Bible journaling: hot air balloons

Friday, February 10, 2017

Hope Ladder for Chronic Pain, Depression or Suffering


The LORD is near to the brokenhearted and saves the crushed in
spirit.
Psalm 34:18

My Inspiration for a Hope Ladder

So, this post is going to deviate from my usual posts about Bible journaling. This post is a download for anyone who needs a "hope ladder". I got the idea from a video my older daughter shared with me. It was posted by a YouTuber called Martina. From what my two daughters tell me, Martina and her hubby, Simon, travel and share their adventures in the form of videos.

*Disclaimer: I am in NO WAY associated with Simon and Martina. However, I do share something in common with her, and that is chronic pain. I won't go into my story, but if you suffer from chronic pain, depression, etc., this video is VERY motivating and inspiring. Martina shares her real, raw feelings here, and I just loved it.
_________________________________________________ 

Watch Martina's AWESOMELY INSPIRING video here:

*Caution there is one brief swear word in the video.
http://www.eatyourkimchi.com/an-open-talk-about-my-depression/
_________________________________________________  


 So....What is a Hope Ladder? 


In her video, Martina describes it as a way to pull yourself out of darkness. And that is what I had in mind when I designed it! Of course, she was talking figuratively about how small experiences, like learning to knit or going to a cafĂ©, can help pull you out of your dark pit. And if these experiences make life joyful and hopeful, then why not keep them where you can see them and think about them? Hence, the Hope Ladder!
 
You can print the sides of the ladder and then add rungs as you go! You can put them on your wall and use them to record:
  • your adventures
  • good memories
  • happy thoughts
  • inspiring Bible verses
  • photos
  • ticket stubs
Whatever you like to help remind you that life is still fun and beautiful and worth living. <3


Print Your Own Hope Ladder

Below is the "hope ladder" for you to print and build with your own memories. I wanted to make it available to everyone. Here's how to do it:

1. Click on the pictures one at a time.
2. Then right click to "save picture as."
3. Save them to your computer and print as many as you want!

Choose from the plain wood, or the more colorful designs. Or mix and match. :) 

These photos are of me and my family in 2014 in Colorado... the last vacation we took before my chronic foot pain began, before walking became almost impossible for me. Before my life was turned upside down.
I miss the "old" me that could hike for miles, and ride horses, and raft rivers, and climb mountains.
But I know these light and momentary troubles won't last. :) There is still so much good, so much to hope for and hold onto.
 

Enjoy! And remember, there is hope. You are not alone. I've spent nights crying out to God, tears streaming down my face, clutching my body in pain. But I've also spent days laughing until I cry, and enjoying the people who love me, the taste of delicious foods, the feel of  the sun on my face, and the beautiful world around me!

Life has its bad days, yes, and sometimes our minds and feelings trick us. But don't lean on your own understanding. Remember there is a God who loved you enough to die for you. His joy comes in the morning. Hang in there. Climb another rung on your ladder. And if you're too tired, lean on Him.
“I have told you these things, so that in me you may have PEACE. In this world you will have trouble. But TAKE HEART! I have overcome the world.” John 16:33
 
*Also, you can learn to make origami butterflies here:
 
 
Here are the rungs of the ladder. At the very bottom are the sides. Print your favorites!


These are the sides of the ladder. Print as many as you need.
Overlap them to make it as tall as you want!


Tuesday, February 7, 2017

Bible Journaling: Words & Fonts

Have you ever looked at Bible journaling on Pinterest and noticed how amazing other people's handwriting can be? People often don't realize that many of those fancy-looking words are actually FONTS. Or maybe you knew this, but you have no idea how they get those fonts.
Or where.
Or how to put them on your computer, let alone USE them in your Bible.

It can all be so confusing! So today, I'm writing about fonts... the different kinds, how to find, install and use them in your Bible journaling.

Types of Fonts

In college I took a class where our teacher taught us about fonts. There were all kinds like serif, sans serif, Egyptian, script. None of this is important for you, except to know that mixing fonts can have a very nice effect.

For instance:


In the above photo, I actually didn't use fonts except for the words "holy spirit". And you're going to hate me for this, but I don't know what that font is. I just happened to see it in someone else's photo and totally stole it to use in my own Bible. But I want to point out that my handwriting is a mix of blocky, straight-edged letters (except for "of them" which is cursive). But the contrast of the blocky, straight letters with the curvy "holy spirit" makes the words really stand out.

It's something to keep in mind. When you're writing out a verse, try using blocky letters for the regular text and curvy or exciting letters for the bigger, more important words.

Finding Fonts

The next time you're on Pinterest, search for Bible journaling fonts. You'll get lots of ideas like this one from CdotLove Design:


This list conveniently shows you different types of fonts and their names. On the blog page, she also provides links to the fonts: http://cdotlove.blogspot.co.uk/2015/01/some-new-great-fonts.html?m=1


Downloading and Installing Fonts

A word of caution. Any file you download to your computer can potentially cause harm. It's something you'll have to use your judgement for, or get a tech-savvy friend to help you with. I leave all the techy stuff up to my hubby. However, some font websites are well-known and generally considered "safe" such as:

dafont.com
fontspace.com

I've used fontfreak.com for years and haven't experienced any troubles. But again, do your research.

To download you go to the font website and either search for the font you want or follow a link provided. In this case we'll use a link from the example above and try to install "Sweet Pea" because I think it's adorable. And I wants it (best Gollum voice). *Note this font is for personal use only. I'm using it here just as an illustration for how to download a font.

I'm using cdotlove's link to find the Sweet Pea font on dafont.com. I'll paste the link here for you:
http://www.dafont.com/sweet-pea.font

First, download the font by clicking the DOWNLOAD button on the right.


Next, choose to SAVE AND OPEN the file.


Now that you have the font, here is how to install it on your computer. If you have a Mac or a different version of Windows, you will have to look up this step for yourself. This is how I installed it on my own version of Windows:


Step 1: Go to "My Computer"
Step 2: Open Local Disk (C:)
Step 3: Open the Windows Folder
Step 4: Right click on the Fonts folder. Drag it to your desktop and "create shortcut." Now you won't have to search for your fonts folder again, you can access it through the new shortcut.
Step 5: Open the fonts folder. Drag and drop the font file (in this case, it is called Sweet Pea_2.ttf) to the desktop FIRST. Then drag and drop it into the fonts folder. It should say "installing font."

Now you should be able to use your new font! Open Microsoft Word (or similar program) and find your font. You can type up words or Bible verses, print them out and either glue or trace them into your journaling Bible!


Wednesday, February 1, 2017

Bible Journaling Using Gelatos

Bible journaling with Gelatos

All of them were filled with the Holy Spirit...
Acts 2:4

So, I finally did it. I finally broke down and ordered some Faber-Castell Gelatos. I have no idea what they are, but the idea of combining pretty paints and dessert sounded good to me. Plus, I've seen them pop up time and again on Pinterest.

Here's the skinny on Gelatos:

They come in tubes that remind me A LOT of Lip Smackers. If you've ever wanted to paint a picture using your lip balm, then these are for you. Seriously, though, Gelatos have an effect a lot like watercolor, but without the messy bleed-through.


I kind of love them.

When I sat down at the kitchen table this morning and opened my journaling Bible, I didn't have much of a plan. So, I found a good verse to read about and then went straight to art. I drew a lovely little doodle of a crown and some words with it.

I'll admit I didn't meditate as much as I should have. I was in such a hurry to try my gelatos, I kind of lost track of the real point of Bible journaling, which is to make the word of God personal in a beautiful, colorful way. (At least, that's how I use it.)

So, it's not surprising my first attempt was a fail. As I picked up my gelatos, I realized they are not really useful on tiny details, which this doodle had. They are very pretty for larger images or background color, though.

Attempt #2

I slowed down a bit and did a little research on Pinterest to find some ideas. Then I tried out my gelatos on paper to see how they interacted with each other, with water, with blending, with pencil on top and beneath.

How Gelatos interact with pencil and water and blending.

Then I turned to Acts.

I decided to use my Gelatos to try to capture the fire of the Holy Spirit.


I cut a heart out of paper and quite boldly put the gelato onto the page and just kind of winged it. I scribbled around the edges, using the heart as negative space. *Lesson learned here: take the lids of your gelatos and have them ready if you decide to do this. I had to hold my paper heart in place with one hand while trying to take off lids with the other. A bit tricky.


After I'd scribbled over the heart with my gelatos, I then wet a brush (they come with one in the package) and tried a little blending (with paper behind my page to stop bleed-through). I also tried blending with the squishy and not-so-squishy blending sponges (also included with the gelatos).

Gelatos = No bleeding through the Bible page!

HOW LONG DO GELATOS TAKE TO DRY?

I don't know how long these take to "cure". I don't say "dry" because they're not really wet. They are kind of like squishy crayons. They were "dry" to the touch shortly after use. The only "wet" parts were places where I'd put the gelatos on too thick. Still, I'm leaving my Bible open tonight. Tomorrow I'll close it and then update this post of the Gelatos leave marks on the opposite page. Sound good? :)

Update** Gelatos seem to dry fairly quickly. They're not really "wet" to start with, so if you leave your Bible open for an hour or two, I don't think you'll have too much trouble with smudging or transferring to the opposite page when you close it. However, I let mine stay open for a few hours just to be safe. :)

FINAL EVALUATION OF GELATOS:

  • They are like painting with tubes of lip balm, only much brighter
  • They blend nicely with or without water (some people say to use a baby wipe to blend)
  • They look like watercolor paint when blended
  • They do not bleed through thin Bible pages! Hooray!
  • Bible words DO show up beneath Gelatos
  • They DO work OVER Micron pen, but smudge over pencil
  • Pencil DOES write on top of Gelatos!
  • Not great for tiny details, more for use as background color or large images
  • Do they need time to "dry"? The jury is still out on this.
  • Fun and pretty to use!


 *Note: I dated my Bible entry wrong. This doodle was done on February 1, 2017. LOL!


Saturday, January 28, 2017

My First Watercolor: With & Without Gesso

Using watercolor in Bible journaling

Isaiah 43:19a
See, I am doing a new thing!
    Now it springs up; do you not perceive it?


A NEW THING
I've been Bible journaling for a year now. And always, always I've used the same old, safe technique:
first pencil, then Micron pen, then fill with Crayola Twistables or gel pens. It was safe. It was familiar.

Then one day I got it in my head to use paint. I felt bold and brave! I researched online and found out a few things. Like, if you don't want the paint to bleed through those fragile, frail Bible-thin pages, you need to prime your page with gesso.

So, I did! I painted both sides of the page. It was wet, messy and dried VERY wrinkly. I was so discouraged that I left that page alone for almost a YEAR. I didn't touch it, which was unfortunate because it was one of my favorite verses.

You can read about gesso and other Bible J supplies here.

So, fast forward to this morning. I was thinking that I'd started this here Bible journaling page to inspire others, but also MYSELF to try new things! So, I was going to be brave and give paint another shot... not just any paint... but that beautiful, translucent, runny wet WATERCOLOR!
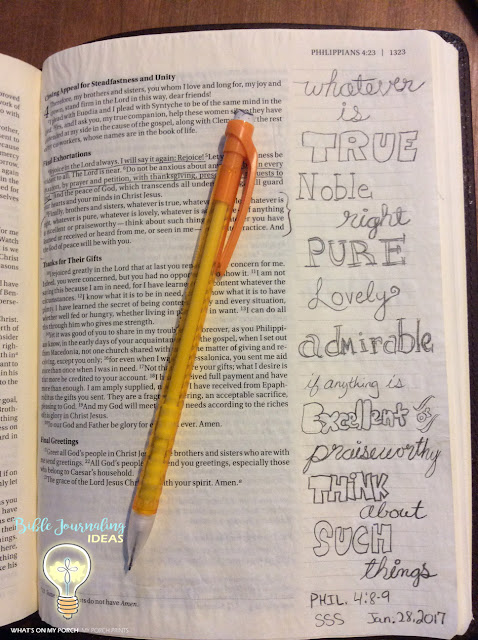
I loaded up my new toolbox and set up shop at the kitchen table.


WITH GESSO
So, I was thinking I'd like to show what watercolor does to super-thin Bible pages. But what verse to try? Then I remembered one of my favorites. I turned to Philippians 4:8-9 and lo! That page felt... funny. And I remembered it was the page I'd coated with gesso all those months ago. I'd had the same plan to use watercolor on that page, but chickened out after it went all wrinkly.

But it wasn't too wrinkly anymore. In fact, it had been flattened quite nicely. So, then I got an idea to show you fine people the difference between watercolor on gesso and watercolor on a page that DIDN'T have any gesso on it.

Here goes.

I started by propping up my Bible with this totally professional set of kitchen tongs. Okay, laugh if you want, but getting your Bible to lay flat when you're all the way down in Philippians is no easy feat!


I began writing out my Bible verse in pencil. In hindsight, it would have been a bit more "PRO" to print out tidy fonts and trace them, but I'm lazy.


Then I tested out my old cheapy watercolors from who-knows-when. They still worked, although the yellow and brown were almost gone, but who needs those, right? I liked my first attempt (on the white paper), so I folded up some paper, stuffed it behind my gesso-coated Bible page (just to be safe, I mean no point in ruining the whole book of Philippians), and I started painting.


I'd read that less water=less bleed. So, I dabbed my brush on a paper towel. I didn't really have a plan here, and rainbow seemed like a good option, so that's what I did.

After the paint was all dry, I went over the words with black Micron pen. You can see the finished product as well as the back of the page. Not too much bleed-through. I call it a success!

Watercolor on a page primed with gesso.

The back of the gesso-primed page.

NAKED PAGE (NO GESSO)
So, now it was time to try watercolor paint on another page that had NO gesso protection, a blank naked page. Flip ahead to 1 Timothy 4:16. I'd worked on this verse back in November and never actually colored it. Perfect! I could see if the Micron pens bleed when covered in watery paint!

I did another hasty rainbow-ish coat (remind me to think ahead a little next time). And you can see the bleed-through difference on the back.


Watercolor on a page WITHOUT primer.
(Also I painted on top of Micron pen, which held up great! No smears.)


On the left, the back of the gesso-primed page. On the right, the non-primed "naked" page.
You can see the gesso kept the paint from bleeding through (mostly).


All-in-all I would say, "Gesso for the win!" It really does keep the paint from bleeding too badly. However, it is very time-consuming. Lots of painting and drying. Then you have to get those wrinkles out. If there's a way to do that besides lots of time being smashed flat, I don't know how. The naked-page method, however, works okay too. But I might need to put stickers on the other side of that page.

Hey! That just means I get to try another new thing, right? :)

Want MORE Bible J Ideas? Check out my post on how to draw wreaths and laurels.

Welcome! Hope, Fear & My First Ever Bible Doodle

There is something about a blank page. It holds so much promise, but at the same time it's daunting. Funny how hope and fear often live side-by-side. What do I hope for when I see all that blank white space? To fill it with ideas that are as amazing in reality as they are in my mind. And my fear? That I won't. That I'll mess up. That something will be lost in translation and go horribly, irrevocably wrong.

But what does God say about hope? About fear? Hang on. I'll go look...

HOPE

Romans 5:3-5
 ...but we also glory in our sufferings, because we know that suffering produces perseverance; perseverance, character; and character, HOPE. And hope does not put us to shame, because God’s love has been poured out into our hearts through the Holy Spirit, who has been given to us.

Hope is the result of character. Isn't that odd? So, if we lose hope, it reflects poorly on our character. So, what about fear?

FEAR

The Bible is constantly telling us not to be afraid. In fact, God commands it (Joshua 1:9). We are reminded not to worry, not to be anxious.... to be courageous!

Philippians 4:6-7
Do not be anxious about anything, but in every situation, by prayer and petition, with thanksgiving, present your requests to God.  And the peace of God, which transcends all understanding, will guard your hearts and your minds in Christ Jesus.

With that in mind... I will share my very first Bible journaling attempt with you. I won't be afraid that you'll judge me... right? :)

In the beginning....

Okay, so I got my NIV Journal Bible at the start of 2016. I was so excited! I'd seen all the amazing art on Pinterest that all the other creative-types did, and I just knew I could make beautiful verses come alive in my Bible!

I began like God... in Genesis. :) I didn't have a grand plan, just an idea of what creation was like in my mind. Then I sketched it out in pencil, tried out my (then new) Micron pen, filled it in with Crayola Twistables and colored gel pens, and even experimented with my white ink pen... which sounds good in theory but has been a bit difficult to implement.

Well, it's not as easy as it looks, folks. Turns out, there's a lot of planning that goes into those too-perfect-to-be-real fonts and all those pretty how-do-you-get-it-to-look-like-that! watercolors that you see on Pinterest. But it came from my mind and heart. I love to doodle. So my style reflects that. It's not meant to be perfect, just fun and real and sometimes awkward... like me. :) I felt like a kid, bringing my clumsy art to God and saying, "Do you like it?"


And God saw that it was good....

All-in-all it makes me happy. It reminds me of creation. Isn't that really the point? To create something personal, bring verses to life? And to inhale God.... and exhale art, color, words, feeling?

Don't be afraid. It's okay to mess up. God knows we're not perfect. He loves you anyway. I think if God had a fridge, he'd hang this on it and smile. And my little-kid heart is happy.