This blog contains affiliate links. To learn more, please read the Disclosure.
Showing posts with label bible journaling. Show all posts

Wednesday, May 16, 2018

Bible Journaling: Gelato Galaxy

how to create galaxy art in your bible

Bible Journaling: Gelato Galaxy
Hey Bible J-ers! Today, my daily Bible reading took me to Romans. I just love Romans, don't you? It's chock-full of truth! There were so many good little tidbits in that first chapter! But one verse stuck out to me:

For since the creation of the world God’s invisible qualities—his eternal power and divine nature—have been clearly seen, being understood from what has been made, so that people are without excuse. Romans 1:20

I thought about how creation speaks of a creator. Anyone can see it! I thought this would make a great verse for Bible journaling, and since I've been thinking about trying to make a galaxy-style picture of some sort, I decided this was the verse to try it on!

sunflower and leaves

Sunflower & Leaves
Okay, first I used my Micron pen (no bleed-thru! yay!) to sketch a sunflower in the corner and a couple of big, simple leaves. You might be wondering what on earth sunflowers have to do with galaxies. Well, not much. But I have also been wanting to draw a big sunflower in my Bible-J. And this whole creation thing includes sunflowers, too, so yep. That's my thought process. Ha ha! But seriously, I like the contrast of the bright flower and the galaxy. It's almost like it is the sun, shining out there from the corner of the page.

Creation speaks of God Bible Journaling Romans 1:20

Words
Next, I used my Faber-Castell Artist Pens to draw my words. I am the world's worst hand letter-er. But I've learned a few tricks to take icky handwriting and make it a bit fancier. You can read about how to make your handwriting fancier here.

Prepping The Galaxy Page
I colored in my sunflower and leaves with gelatos, then I got to work prepping for my galaxy. I started by using white crayon to draw some dots and circles on the page, hoping they would show up through my gelatos like stars. I outlined my verse and colored over it with white crayon to keep the gelatos from covering it.

white crayon stars


Creating My Galaxy

If you're not familiar with gelatos, read about them here.

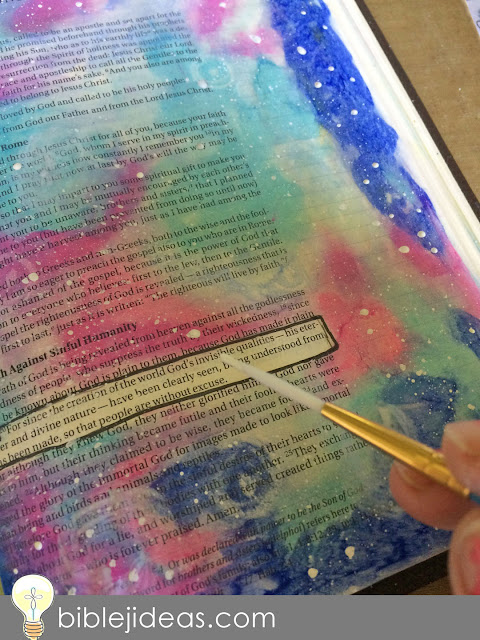
Beginning in the corner, I used boysenberry (dark blue), snow cone (light blue) and passion fruit (purply-pink) gelatos from the Faber Castell Bright Gelatos set. I smudged them with the hard sponge and used circular motions to blend them together. Be careful doing this. Make sure you're holding your Bible page firmly so as not to tear it. I continued adding small patches of color and blending them together. Other gelatos I used included elderberry, acqua dolce and bubble gum as well as shades of greens, yellows, etc., all from the Brights and Pastels gelato collections.. I had a little trouble blending in the dark blue (boysenberry) gelato. I don't know if it was just that one, or if all the boysenberry gelatos are difficult to blend.

Use gelatos to create galaxy colors

Blend gelato colors for galaxy


Adding Stars
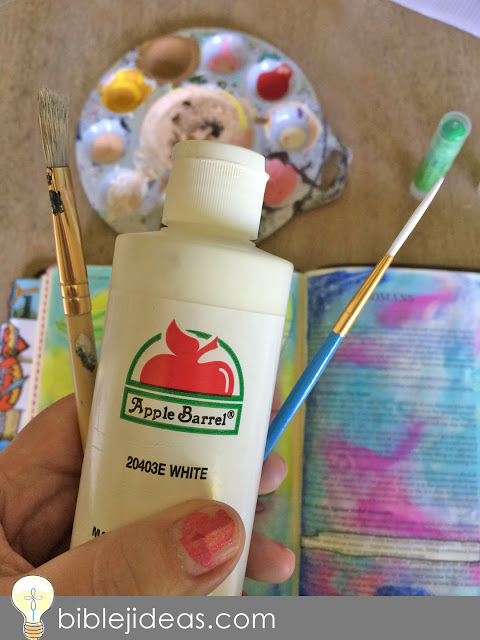
After blending, I used white acryllic craft paint to make stars. I dipped a stiff bristled brush into some water and then into the paint, then running my finger over the bristles, I splattered white "stars" into my galaxy. I also used a small pointed brush to create larger stars.

Using white paint to make stars


Using white paint to create stars


Use white paint to make stars

Moving over to my sunflower page, I also used white paint to add highlights to my sunflower, leaves and words.

Gelatos sunflower

Highlight text with white paint


Sunflower and Galaxy for Romans 1:20

All-in-all, I'm very pleased with my first gelato galaxy! Are you going to try it? Share your photos with me on Facebook!


Monday, March 19, 2018

Bible Journaling: 7 Ways To Use Washi Tape

Ways to use washi tape in your Bible journaling

7 Ways To Use Washi Tape (Plus a FREE printable at the bottom of this post!)
I have recently discovered the joys of washi tape. Have you ever used it? I love the pretty colors and designs, but I was never quite sure what I was supposed to do with it...? I'm pleased to tell you, after much research, there are LOTS of things to do with washi tape. Here are just a few.

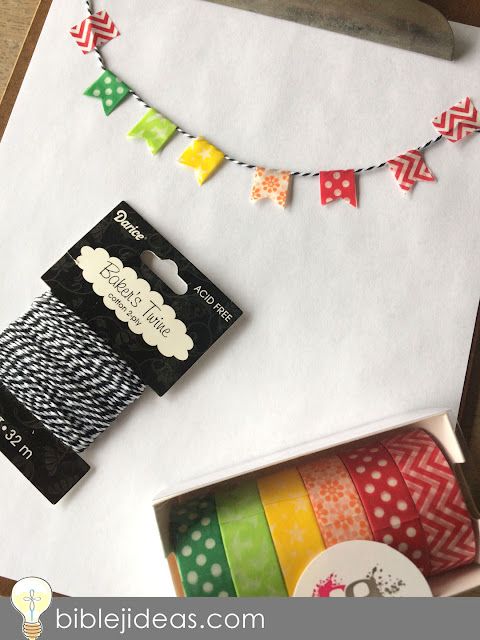
1. Make a banner
To make this washi tape banner, you'll need some baker's twine. Simply cut off a piece of tape, wrap it around the twine and connect it to itself. Then cut the bottom off in an upside down V shape as shown.

Washi Tape Banner

How to make a washi tape banner


2. Mark a page edge
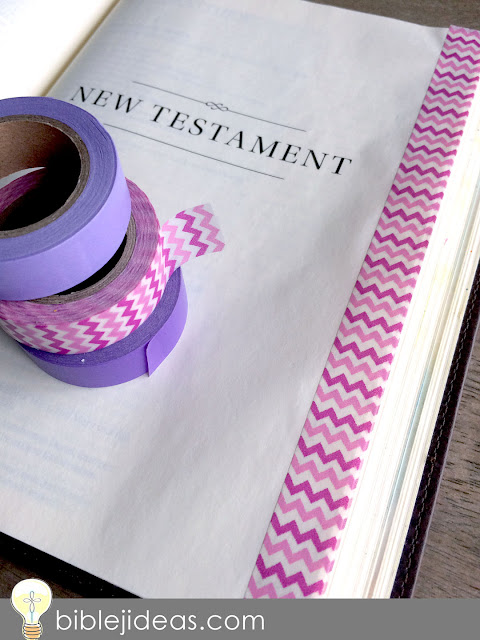
This is as easy at it sounds. Just use your favorite color washi tape on the edge of an important page. I used mine to quickly locate the New Testament, but you could mark pages by category (love, trust, etc.) or mark each book, whatever suits you best!

Washi tape border

Washi tape Bible border tabs

3. Make dangles
This was a fun project. I cut the washi tape into thinner strips (although you can buy skinny washi tape, too). I made each one a different length and then created "dangles" with stars on the ends. I have a printable that goes with this available for you at the bottom of the post.

Washi tape dangles for your Bible journaling


4. Attach items to your Bible
I created a cute little door that opens and closes and used washi tape to attach it. Get creative with this! You can attach all kinds of cute little opening flaps into your Bible, using them to hide words and pictures that can only be seen when the flap is lifted. Cute! I have a printable for this at the bottom of the post, too.

Use washi tape to attach 3-D items into your Bible


5. Cover mistakes
If you've ever had bleed-thru or mistakes in your Bible J, cover them with washi tape! And create new art on top if you want. Read more about this here.


Use washi tape to cover mistakes


6. Corner bookmark
Have you seen all the cute corner bookmarks? Follow the diagram to make one. And once you do, cover it in washi tape!


Make a washi tape corner bookmark

How to make an origami corner bookmark


7. Feathers
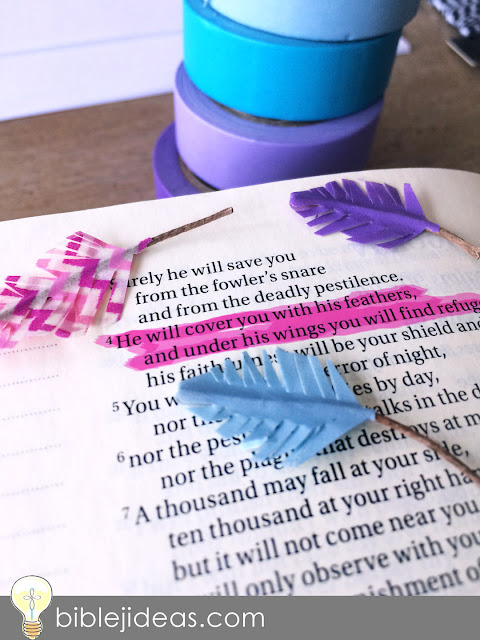
You'll need some thick crafting twine or cord to make these washi tape feathers. Cut cord to desired length, fold a piece of tape over the cord, attaching to itself. Then cut lines into the edges, going back at a slightly different angle to cut out a few pieces. Finally, cut into a feather shape.

Make washi tape feathers


What are YOU going to make with washi tape?

Free Printables
To download these free printables, click the image below to open. Then right click and save the file. Color & cut OR trace into your Bible. Enjoy!


Want MORE Bible J Ideas? 
Read my post on How to Draw Arrows.


Friday, March 16, 2018

How To Use Washi Tape to Cover Bleed-Thru


Washi tape in your Bible journaling

Bible Journaling: Washi Tape to Cover Bleed-Thru
As a little kid, I loved stickers. I was obsessed with them. There was no sticker that I wouldn't collect. And most of them ended up on my headboard. And half of those ended up in my hair. But I didn't care. Stickers are the bomb! And what is washi tape except one long, pretty sticker?

This is my first attempt at using washi tape, and you can expect more posts to come! This stuff is sticker-tastic fun. You'll find a free "washi tape" printable at the end of this post. Or you can find the washi tape I'm using here.

Today we'll take a look at how to cover bleed-thru with washi tape. If you've ever used markers or paints in your Bible only to flip the page over and find your art has leaked through, then this is the post for you!

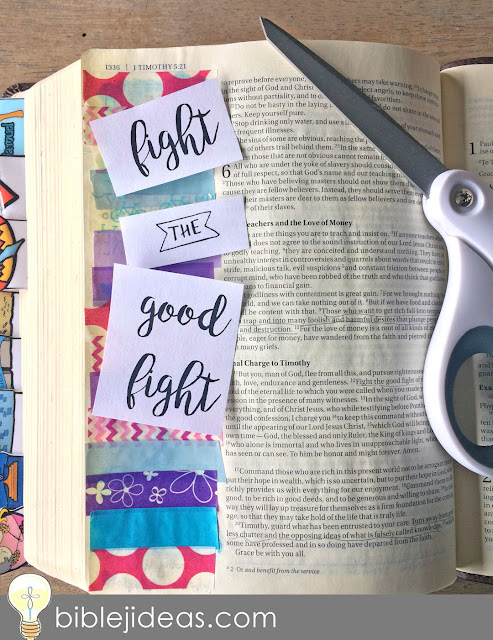
Step 1: Locate the offending page and begin cutting strips of tape to fit over the bleed-thru. I wasn't worried about getting them all perfectly straight or exactly the same size. I kind of like the messy look. It's like a messy bun for your Bible.

Bible journaling bleed-thru

Covering mistakes with washi-tape

Step 2: That's all. There is no step 2! You just cover it up! How easy was THAT? And it's cute and pretty and effortless. The end.

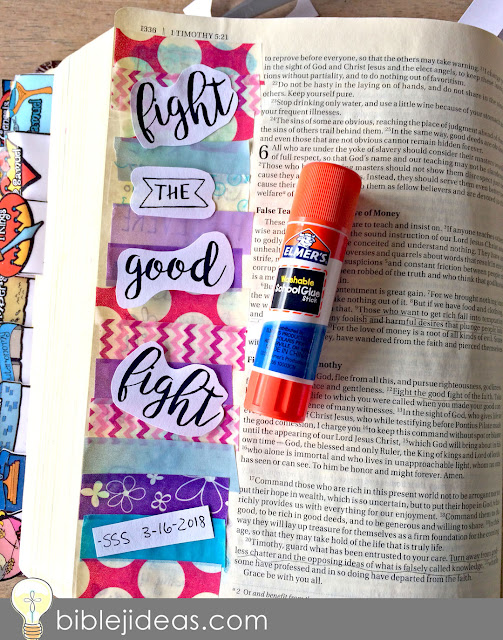
Okay not the end. I actually decided to add some words over my washi tape, cuz hey, I like words. And words in the Bible are pretty important. So, I printed out a few words from a pretty great verse and cut around them, gluing them over the washi tape.


Fight the good fight with washi tape! :)

Fight the good fight

All done!
And there you go! A beautiful, colorful, quick fix for bleed-thru in your Bible! I was hesitant to give washi tape a try, but I'm so glad I did! And I think you'll like it, too!

Before & After using washi tape to cover mistakes

Fight the good fight


Free "Washi Tape" Printable
To download this free printable, click the image below to open. Then right click and save the file. You can print this on sticker paper or just print on regular paper and cut & paste it. Of course, it's not the same as actual washi tape, but you can use these fun patterns in your Bible journaling to make your own creations. Enjoy!


Free download from www.biblejideas.com


Want MORE Bible J Ideas?
Check out my post on How To Trace An Image Into Your Bible.

From Bible Journaling Ideas

Tuesday, March 13, 2018

A Simple Banner You Can Draw Today

How to draw a banner: His banner over me is love

You're probably familiar with these words from Song of Solomon 2:4. Maybe you even have a song from Sunday School playing in your head right now. I do! :) Here is a cute little banner you can draw to go along with it!

Materials:
I'm using a Micron Pen and a Faber Castell PITT artist pen big brush, both in black. I'm also using Tanmit brush markers for coloring.

To learn more about these and other items, read my post about Bible Journaling Supplies.

1. Banner
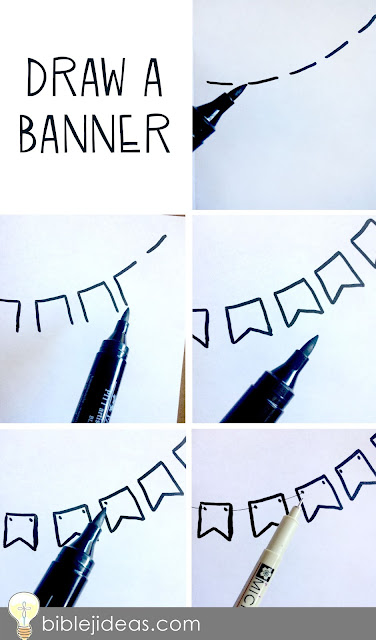
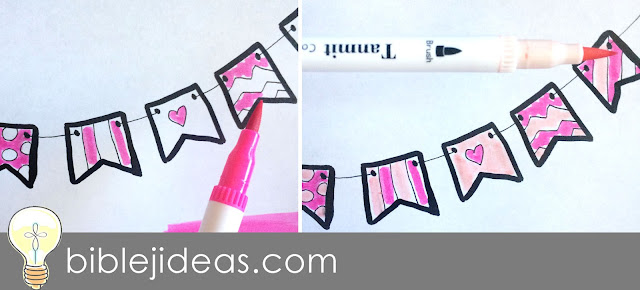
First, we'll draw the banner. Using the big brush marker, draw dashed lines in a curve. Next add sides to begin forming your flags. Then draw an upside down V shape to connect the two sides of each flag. Draw a dot in each of the top corners of the flags. Then using the smaller Micron pen, connect each flag.

How to draw a banner


2. Flags
Decorate your flags by adding polka dots, stripes, chevrons, etc. I also added a heart to the center flag.

Decorate your banner


3. Color your flags.
Be careful not to get too close to the black outlines as they may smudge.

Color your banner


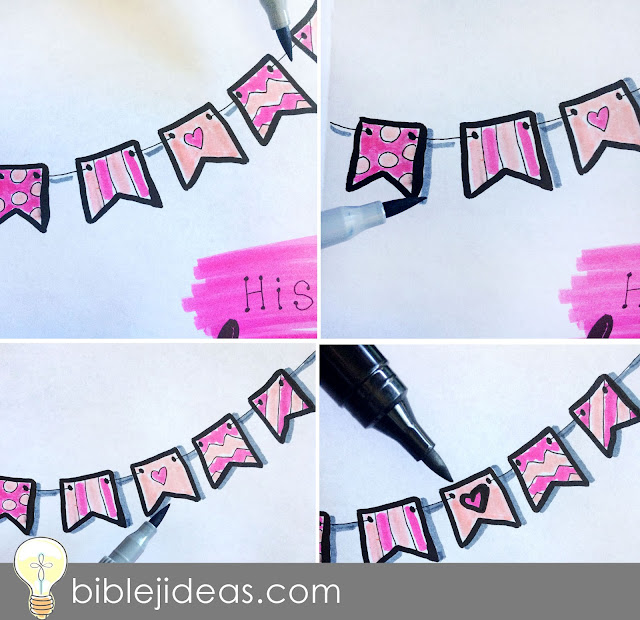
4. Shadow
Add a shadow to your banner. Use a light gray marker to draw a shadow beneath the "string" of your banner. Then draw a shadow to the right of each flag and below each flag as shown. I drew my shadow a little too far away, so I went back and connected it to the "string" of the banner. Then I outlined the heart with my PITT brush to make it stand out more.

Adding a shadow to your banner


5. Background Color
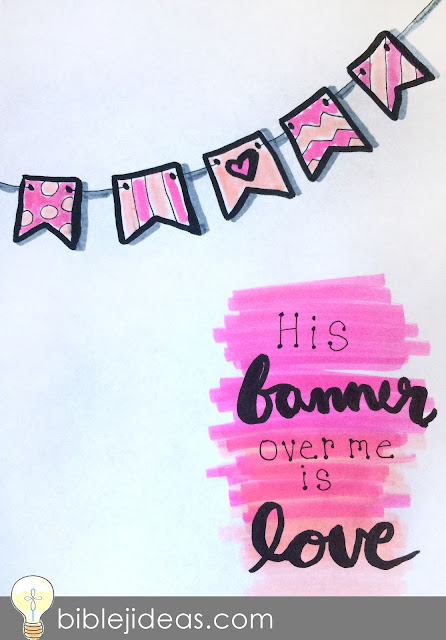
Color a background for your words. I tried to create a gradient using pink and peach. If you're coloring in your Bible, this would go in your margin.

A background for your text

6. Draw your words. 
Using the Micron pen, draw the word "His". Then go back and add round dots to the ends of each letter. Next, using your cursive handwriting draw the word "banner". Go back and add thicker lines to each downstroke. To learn more about Handwriting Tips & Tricks, read my post. Repeat this process for the rest of the words as shown. If you've never done this, you can practice on a separate piece of paper before writing in your Bible.

A Simple Banner You Can Draw: Bible Journaling


His Banner Over Me is Love
His Banner Over Me Is Love

And there you have it! An easy banner to accent your next Bible Journaling project. Have you tried making a banner? Comment below or show off your doodles by connecting with Bible Journaling Ideas on Facebook.

Want more ideas? Check out my post to see what you can do with white crayon in your Bible.


Friday, March 9, 2018

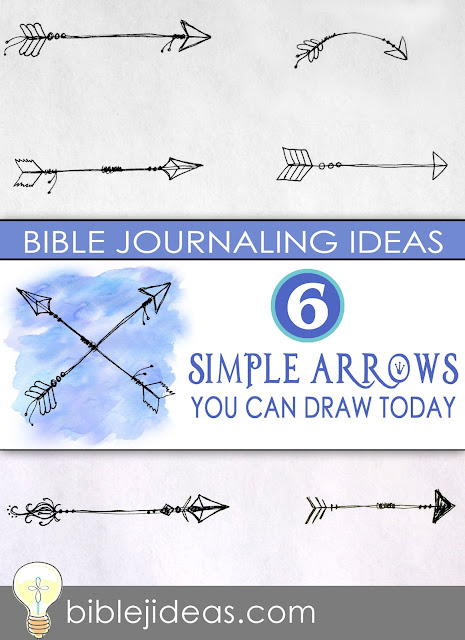
Bible Journaling: 6 Simple Arrows You Can Draw Today

Bible Journaling Ideas: 6 Simple Arrows You Can Draw Today

Bible Journaling: 6 Simple Arrows You Can Draw Today
Arrows are very versatile. You can use them as dividers when you're writing Bible verses, to draw attention to something or just as cute little accents to your art. Most people can probably draw a simple arrow. But if you're looking to add a little flair, here are six arrows you can draw today!

(And if you like these, check out my post on how to draw wreaths & laurels.)

FYI, I'm using a micron pen here. They are great for Bible journaling as they do not bleed through thin pages, and they give a thin, but strong outline. For more Bible-J supplies, check out my post.

Whimsical Arrow
To start this arrow, draw a straight line. Don't worry if it's a tad askew... just go back and forth over it a couple times. To add the point, draw a sideways "v" shape. Then connect the ends back to the shaft. Next, add a kind of slinky shape with a couple dangling pieces. This should look like a string wrapped around the shaft. Next add your fletching to the other end by drawing a few angled lines and then connecting each one with a half-circle shape. Add a couple more dangly strings to the end and three circles on the shaft.

Bible Journaling Ideas: 6 Simple Arrows You Can Draw Today


Tribal Arrow
For this arrow, begin with your straight line with the v-shape tip. Then make a smaller v-shape to connect it back to the shaft, so you end up with a kind of paper airplane shaped tip. Add another v inside the tip as shown. Draw three circular dots just below the arrow head on the shaft. Next add the coil shape to the shaft. And add your fletching on the end by drawing two angled lines and connecting them with a kind of zig-zaggy line. Add another coil with a couple dangly strings.

Bible Journaling Ideas: 6 Simple Arrows You Can Draw Today


Boho Arrow
For this arrow, begin with your line and tip just like you did above. I also filled in the center of my arrow tip to make it more interesting. Draw two spiky shapes just below the tip and then add a few circles and a diamond shape as shown. For the end, start with two curls, kind of like a sideways "m". Next add a couple of wavy lines, kind of like a sideways letter "s". Add another, longer one and accent it with a few dots. Fill in with more curly shapes as shown.


Curvy Arrow
This next little arrow is a fun, curvy one. Start with a frowny-face shape and add your tip as shown. Next add three dots just below the tip. To make your fletching, draw oval shapes, larger at the end and smaller as you go up the shaft. Add a coil just below the fletching on the shaft. Finally, draw two dangly strings on the end.

How To Draw A Curvy Arrow


Simple Arrow
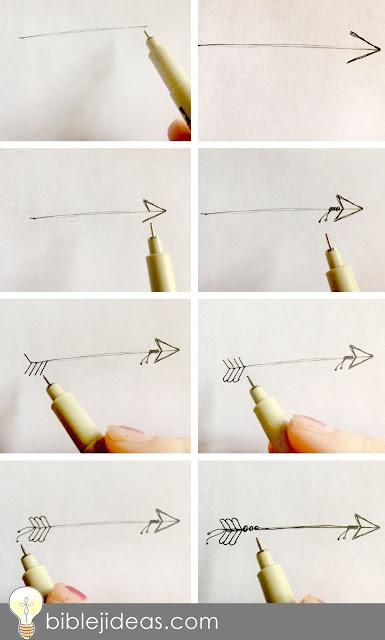
This simple arrow is pretty self-explanatory. Just follow the steps as shown below.

Draw a Simple Arrow


Traditional Arrow
To draw, begin with your line and add two angled lines for the tip. Next, add the shaft lines, three and three, larger at the end and smaller toward the front. Add two little vertical lines next to the fletching and a coil to the shaft. You can also add a vertical line to the tip and fill it in if you like. Then finish with three circles near the tip.

Bible Journaling Ideas: 6 Simple Arrows You Can Draw Today


Great Job!
Have fun and don't be afraid to experiment a little. Mix and match the designs. For color, you can outline your arrows in crayon or colored pencil. They also look pretty with just a watercolor or gelato background. You can read about gelatos here.

And there you have it! Six simple arrows to accent your next Bible Journaling project. Which ones will you try? Comment on your favorites below. or show off your doodles by connecting with Bible Journaling Ideas on Facebook.

Want more ideas? Check out my post to see what you can do with white crayon in your Bible.